Interviews
Learn about people’s attitudes and motivations related to specific topics, products, or services.
Interviews are one-on-one conversations to help people express and clarify their own thinking about a particular topic. Interviews help us understand how people experience the world and answer why they behave in the ways that they do.
Interviews are a flexible research tool. It can be used in many phases of the process to gather information and learn from experts, users, customers, and key stakeholders. Typically, interviews are conducted with people who will be impacted by the product or service you will be creating.
The information gathered will need to be organized to tell a compelling story. There will be a combination of notes, recordings, and quotes that represent the most interesting and relevant findings. Use the learnings to build a shared understanding, inform decision making, and inspire new ideas.
What you’ll need
- Pens
- Notebook
- Person to take notes
- Person to moderate
- Person to interview with
- Audio/video recording device
- Discussion guide
Prerequisite Activities
Downloadable Materials
Preparation
Create a research plan
Always begin all research or testing with a research plan. Know why you’re collecting data and information. Refer to Research Plan activity for the full instructions and template.
Consider modifications in these areas:
- Discussion topics: What do you want to learn about? What topics or questions will you ask participants? Decide on the type of conversation you want to have and what you want to learn about your participant. If you want to learn about general usage and lifestyle patterns, then plan for an open-ended interview with new questions forming as the conversation progresses. If you want to learn about specific things such as validating assumptions about a feature or understanding a reported issue, then plan for specific questions related to those things. The unknowns from Knowledge Gap activity can be a starting point for where you need more information.
- Roles: Who else is involved? An interview requires 3 key people: a participant to interview, a person to moderate, and a person to take notes. The person moderating and the person taking notes should not be the same person. Taking notes while interviewing will distract the moderator from actively listening. If you are interviewing a person that speaks another language, bring an interpreter along. This will help the participant feel comfortable with communicating in their own language.
- Participant criteria: Who would you need to recruit? How many people should you interview? Identify people who know the topic best or have experience with it. Find people who fit the profile of your target users. Aim for 5-8 people per profile type. Consider a variety of backgrounds ranging from novices to experts.
- Duration: How long should the interview be? Plan for interviews to be 45-90 minutes. Do not go over 90 minutes as people begin to feel fatigue and/or need a break for the restroom.
- Location and Environment: Where is the interview taking place? Will it be in a research lab or rental facility? Will it be remote or in a meeting room? Will it be at the place and in the context of where they typically interact with the product or service? Refer to Contextual Inquiry activity for in-context interviews. Select a place for the moderator, participant, and note taker to all sit down and have a conversation.
- Data collection method: How will you collect data? Will the session be recorded? Ask participants if you can record the audio. This will help with recalling aspects of the interview during the debrief. The note taker will bring a pen and notebook to capture notes during the session. The moderator and note taker can review the notes and audio during the post-session debrief.
- Incentive: Provide each participant with a small thank you gift. This can be a gift card to a coffee shop with a small balance or merchandise.
Create a discussion guide
Use the discussion guide template. The template has some example questions that you can use. Write down additional and specific discussion topics and questions that you want to explore.
The discussion guide is a starting place for conversation. It will give you an idea of what to talk about before talking to people. It provides a general structure as well as room for new topics and themes to emerge and explore. It is important in the process to stay flexible as some questions may not generate as much discussion, and some answers may not guide towards inspiration. Take the opportunity during the conversation to update, improve, or be more specific in your questioning as you learn from the participants.
This is the general flow of the conversation:
- Introductions (5 minutes)
- Set intention of the conversation
- Set safe space for the conversation
- Learn about their background (10 minutes)
- Explore discussion topics; use questions to guide conversation (45-60 minutes)
- Conclusion (10 minutes)
Recruit participants and prepare materials
Recruit participants for the inquiry. A few approaches for recruiting are working with an agency, posting online, or putting up flyers on campuses. Explain the purpose of your research to them and offer an incentive.
Prepare any NDAs, incentives, and recording equipment.
Pilot the discussion guide
Pilot the interview session and discussion guide by practicing with your team. Make sure everyone understands their roles, the objectives, schedule, and discussion topics.
Instructions
Arrive at location
Prepare the space for a comfortable environment. Arrange the seating so that the moderator is closest to the participant. Setup the recording equipment, forms, and discussion guide.
Start with introductions
Use the discussion guide for reference. Greet the participant and thank them for making time. Introduce each person. Set intention of the conversation and explain why they are here today.
Ensure a safe space for the conversation. Mention you’re here to learn about them and that there are no wrong answers. Explain that the audio recording and note taking are for learning and reference purposes. Mention confidentiality and ask them for verbal consent.
Ease into the conversation
Learn about their background. These questions will help establish rapport between the moderator and participant. Pay attention to their behavior, body language, and tone. Do they feel at ease?
Dive deep and explore
This is where you will spend the most time. Focus on the core topics. Use the questions from the discussion guide as a guideline to help the participant share more about their perspective.
Practice these tactics during the session.
- Follow-up questions. Ask questions to clarify or dive deeper. Minimize yes/no-type questions. Ask open-end or why-type questions to get more details.
Consider these questions:- What was on your mind?
- Tell me your thinking there?
- Tell me more about your experience with that.
- Why is that?
- Verify your notes. Repeat back what you have heard to verify information they have shared.
- Pause between the next question. Allow space for the participant to speak and share their thoughts. Hold silence for 12 seconds after prompting the participant, to give them time to share. Try to not interrupt them too soon.
- Active listening. Make eye contact and have a welcoming body language. Use a reassuring tone in your voice. Stay engage and in the moment. Leave the note taking to the note-taker.
- Offer them to show and tell. Ask the participant to show you how they use a product or service. Inquire what is challenging about this experience. Capture these interactions to share with the team.
- Avoid these listening barriers
- Judgments
- Assumptions
- Emotional triggers
- Wandering mind
- Correcting the speaker
- Jumping to solutions in your mind
- Sharing your point of view
- Finishing their sentence
- Offering advice
Conclude with final questions
Provide an opportunity for the participant to share information you may not have covered and to ask you questions.
Thank and reward them
Thank them for their time and offer the reward.
Debrief after the session
Spend 30 minutes after each session to briefly discuss findings while your memory is fresh. What was surprising or unexpected? What was new for you? What was useful? What stood out?
Continue with more interviews
Repeat steps 1 through 7 for each interview.
Turn data into insights
After all the interviews are done, it is time to make sense of the information. This is the critical part for discovering key patterns of behavior and interpreting user needs and problems.
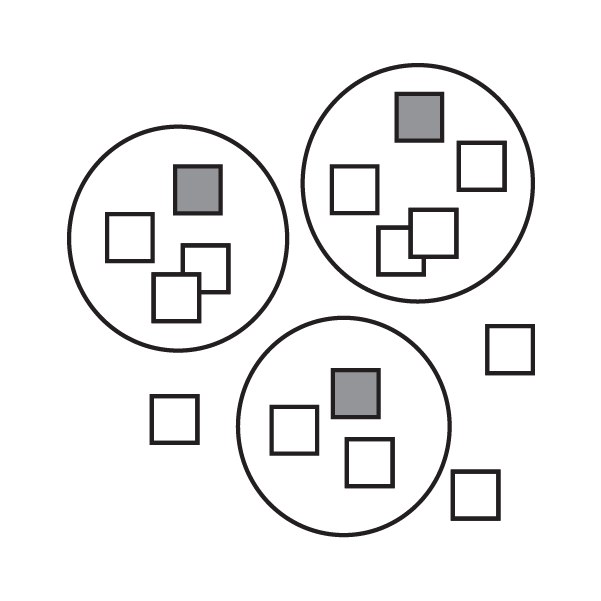
First, review observations from your notes and the recordings. Create an affinity diagram by transferring key observations and highlights to sticky notes. Group the sticky notes (of observations) that indicate patterns of behavior and motivations. Circle the group of sticky notes to form a cluster and label them. Write the labels from the perspective of the user. The labels should capture the key point and summarize the set of sticky notes. After grouping the sticky notes, review the labels. If there are larger themes shared amongst multiple clusters, group them together and label the theme.
Next, create problem statements that describe the users’ intention. Look at the clusters of behavior to understand what the user is trying to accomplish. How is it challenging for them? Interpret the users’ needs and problems. Writing problem statements in this format will help summarize the target user, the need, and the supporting evidence. Focus on the users’ intention and not a feature or solution.
needs a way to ___ [a goal, job, or activity the user aims to accomplish] ___
because _________ [supporting information about your user] ________.
You will end with many problem statements that reflect the users’ needs with supporting evidence.
Supplement the supporting evidence with videos, images, and quotes to tell a compelling story about what matters to your users. You can also combine learnings and opportunities from other research activities.
Additionally, create Personas, Empathy Maps, Current Journey Maps, and Context Maps to communicate more details to the team.
Share your findings with others
Share the insights with the team to build a shared understanding of the users. The team will be able to make informed decisions as they create a desirable product or service.